
Ah, custard. So creamy and eggy and just so damn English.
Custard is one of life’s little joys, one of those things that, when I make it, I find myself unable to prevent myself from stealing a spoonful from the bowl every single time I open the fridge door. All. Day. Long. Until finally, shockingly, the custard is no more.
In the photo above it’s been poured over homemade apple sauce and as a kid I frequently had it served over tinned prunes or plums. Scrummy! It’s mandatory for steamed puddings of any sort and favoured with crumbles, shows up in trifles and is excellent with bread puddings and treacle tarts.
Custard is both easy and difficult to make. The process itself is incredibly easy, achieving the perfect custard is trickier. If you succeed you are rewarded with an incredible, silky smooth sauce. Err just a smidge and you can end up with a curdled mess.
The easy bit is the actual process. Egg yolks are lightly whisked with sugar. Milk and/or cream is brought to a simmer. Some of the heated cream is then poured into the yolks to temper them (essentially warming up the yolks slowly so they don’t scramble) and then everything is put back on the stove and heated gently until it thickens. That’s it. A process which takes about 15 minutes from start to finish.
The tricky part comes with the heat applied to the egg and cream mixture, so it helps to know a little of the science behind the process. In raw form, egg proteins are coiled and folded up. As the egg is heated the proteins unwind, detach and elongate and then, as the heat increases, reattach to each other to thicken the mixture. Use too high of a heat and coagulation will occur too quickly and you’ll end up with dry rubbery bits.
It’s also necessary to stir continually in order to distribute the heat evenly. Stop and the proteins on the bottom of the pan will heat too quickly and you’ll end up with scrambled eggs.
Heating the eggs gently also allows the strands of protein to collect moisture as they reconnect, which makes custard so smooth. If heated too long, the egg proteins lose their shape and can’t hold liquid anymore, at which point they will become curdled and runny.
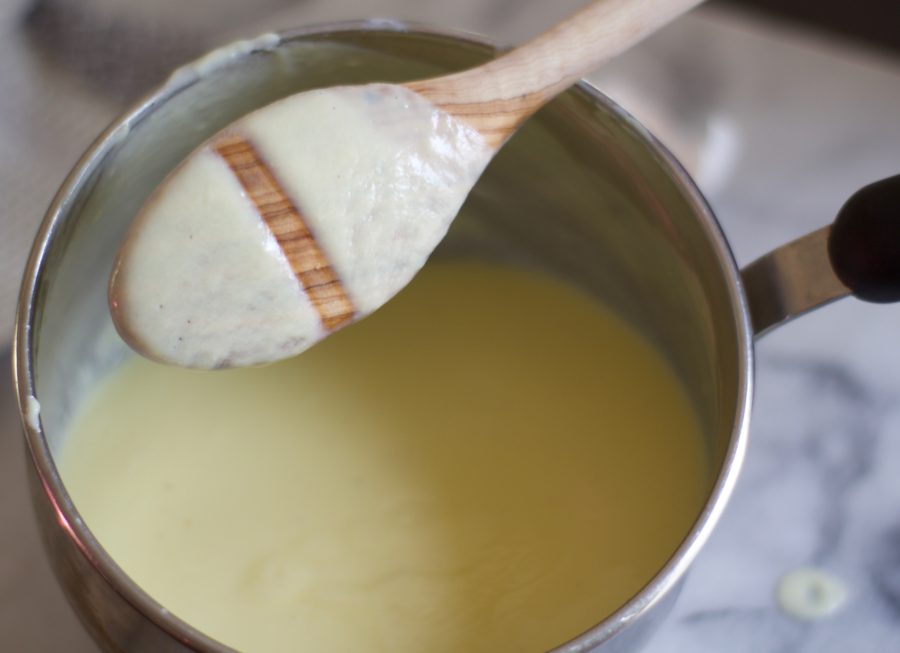
When the custard has thickened nicely, it will coat the back of a spoon and leave a line when you run your finger through it, as you can see below.
So, three important things: heat slowly, stir continually and don’t heat too long. Beyond that, experience is best. The more you make custard the more you’ll get a feel for it and given its versatility – one process producing three different results – it makes it well worth a time investment.
Patience is golden my friends, and in this instance patience is a deliciously creamy, silken bowl of golden custard.
Custard
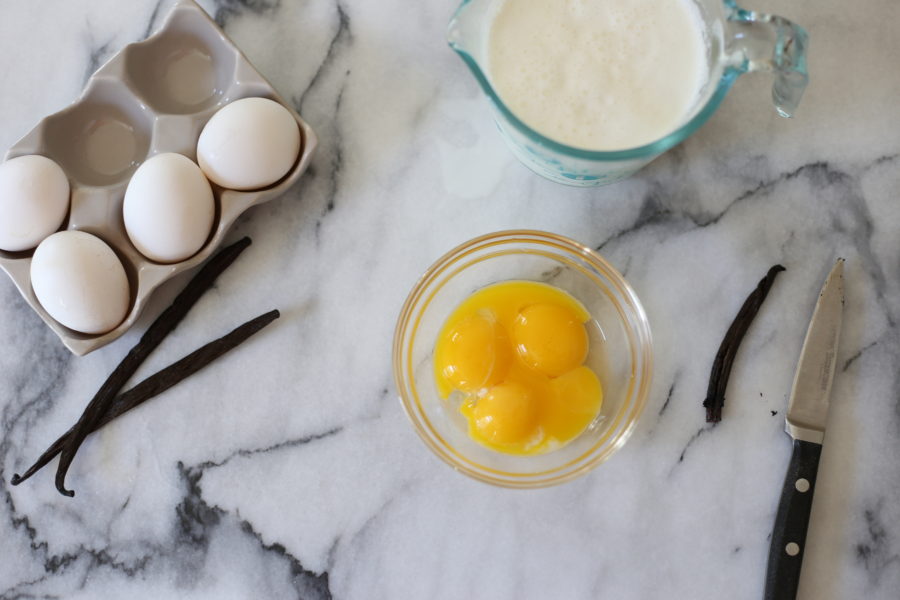
- 4 egg yolks
- 1/3 C. sugar
- 2 C. whole milk/cream*
- vanilla bean/1 tsp vanilla
- Put the egg yolks into a medium sized bowl and whisk together with the sugar.
- Put the cream and whole milk into a medium saucepan and bring to a simmer. If you’re using a vanilla bean, slice it open, scrape out the seeds and add it to the pan as it warms and then let it sit for 10 minutes or so to infuse the milk, longer if you like, you’ll just need to warm it up again.
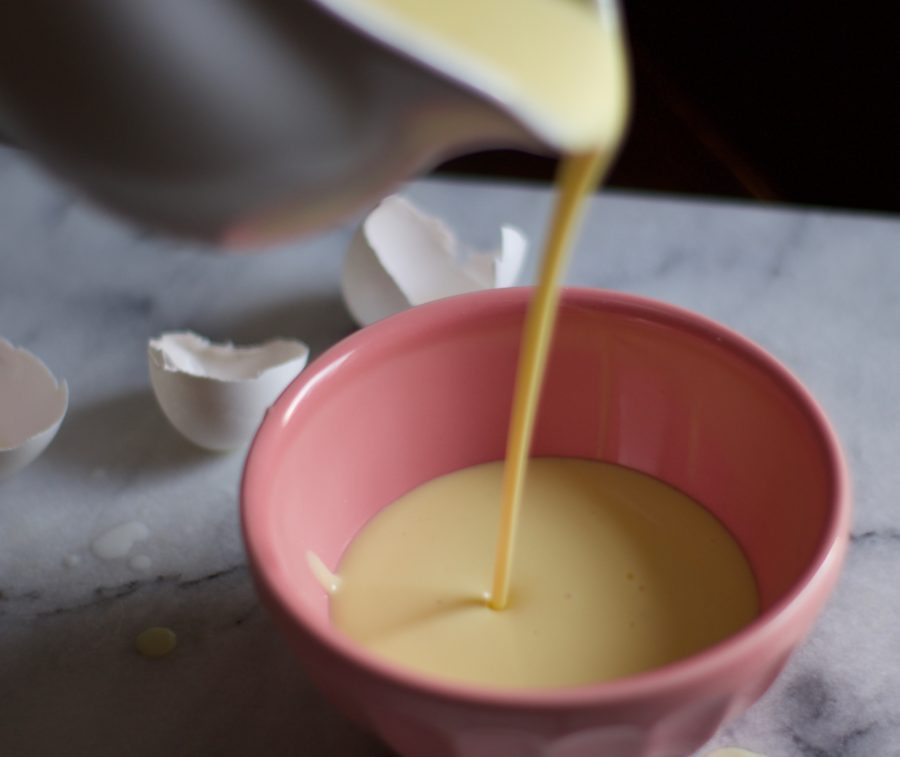
- Once the cream/milk has heated sufficiently (there should be small bubbles forming around the outer edge) slowly pour half of it into the yolks. (At this point I like to whisk the eggs for about 15 seconds to make sure the eggs have fully adjusted to the heat before I put them back on the stove).
- Tip the egg/cream mixture back into the saucepan and heat gently, whisking constantly. (I generally use a heat level between low and medium)
- After about four minutes you’ll feel a slight thickening. Resist the urge to turn up the heat if you’re feeling impatient. Generally, it takes about 8-10 minutes until the custard feels nice and thick. Around the four minute mark, when the custard has thickened ever so slightly, I always find myself instinctively switching to a wooden spoon to stir. I have no idea why.
- When the custard has thickened nicely (do not let it come to a boil), take off the heat and pour through a sieve into a bowl (I always do this because no matter how gentle I am with the custard there always seems to be a couple of lumps, as well as the chalazae, those little ropey bits which hold the egg to the shell wall.
- If you’re using vanilla extract, add it here.
- If you’re not using the custard immediately it’s best to cool the custard quickly, so I place the bowl into a bigger bowl filled with ice water, stirring every so often, a process which should take about 10-15 minutes. Then it’s ready to be covered and placed in the fridge.
*The recipe calls for 2 cups of milk/cream. I generally use 1 cup of each but you can definitely play around with it. You can use any combination of 2%, whole and cream depending on the richness you prefer, just don’t use 1% or fat-free.
Should your custard look like it’s going to separate, the general wisdom is to take it off the heat and beat like crazy or use an immersion blender. I also will add in a little bit cream so the fat can bring it all back together again. I generally find that once custard has split it will never be ultra silky smooth, but you can save it enough that most people aren’t going to notice.
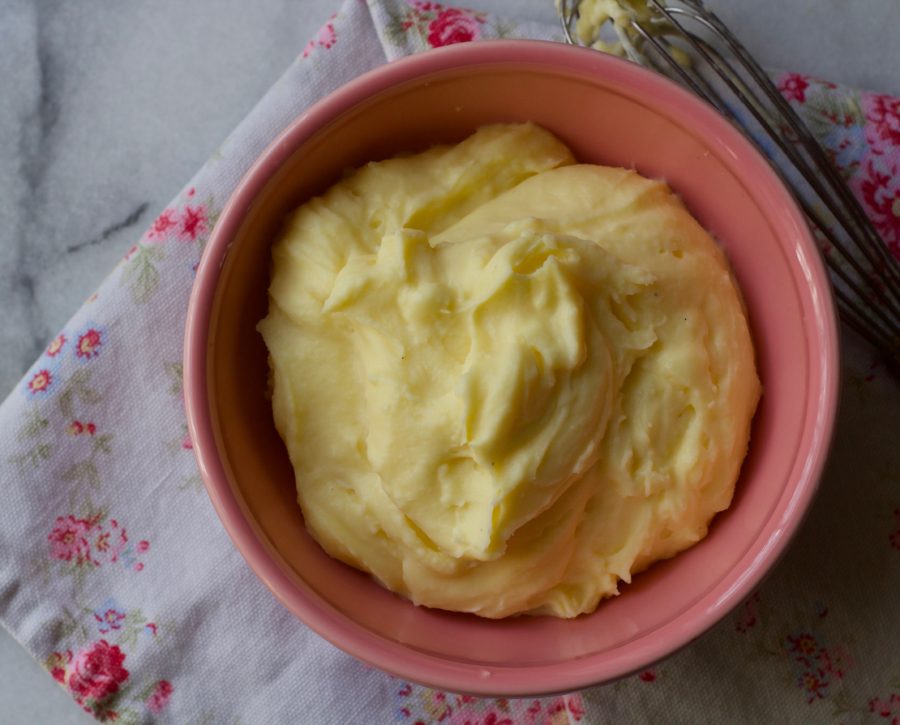
Now that’s pourable custard. The identical method can be used to make pastry cream which is much thicker and is the custard used to fill a chocolate eclair or Boston Cream Pie. Simply take the same recipe, only this time whisk four tablespoons of cornstarch into the eggs and sugar and continue to use the same instructions with one key difference: it must be brought to a boil for about 30-60 seconds. This is extremely important because raw egg yolks contain a starch-loving enzyme called alpha amylase, which must be killed by heating the yolks to boiling point. If it isn’t, your custard will thicken initially, but after sitting around it will revert back to being runny. Trust me, there’s nothing worse than making a dessert with a nicely thickened custard which you come to eat later, only to find that it’s now a soupy mess. When you take the custard off the heat, whisk in a couple of tablespoons of butter and cool it down as above. No sieving is necessary.
Another way to enjoy custard is frozen: aka ice cream. The method is the same although the ingredients differ, in part due to freezing, which tamps down the flavour: a touch more sugar and a pinch of salt is all that’s needed.
Ice Cream
- 1 C. whole milk
- 2 C. cream
- 6 egg yolks
- 1/2 C. sugar
- pinch of salt
- 2/3 C. malt powder (optional)

Use the same method as above, straining this version like the pourable custard, cool completely and then pour into an ice cream maker.
I included the malt powder option because that’s how I made it recently and it was delicious. I add it bit by bit while the custard is still warm to help it dissolve nicely. I bought this recently and it was great. I used to buy this all the time but unfortunately it seems to have disappeared off store shelves around these parts.
And the reason that ice cream serving above is so small? Because that little bit was all that was left when it came time to take a photo. Apparently, I have a pesky issue with ice cream goblins.

Be First to Comment